


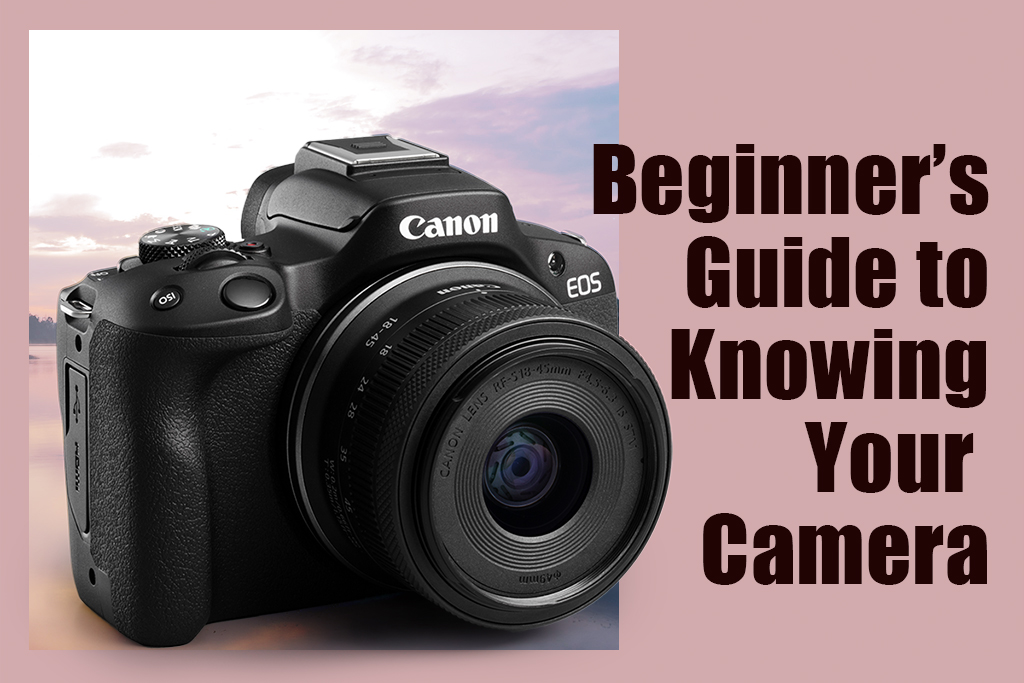
You’ve decided to get your first camera. What next? From which camera to pick, to knowing your camera and lenses, to modes that help you shoot better, this webpage curates SNAPSHOT articles with essential information on camera features and lenses for photography beginners.
1. Which camera’s the best for me?
1. Which camera’s the best for me?

Knowing your camera starts from your buying decision. There is no one-size-fits-all best camera for everyone: the camera you’ll enjoy using depends on what you plan to shoot as well as your personality and preferences. These articles provide some suggestions on what camera features to consider, and how they affect your pictures and shooting experience.
- 7 Things to Consider When Choosing Your First Canon Camera
- Full-Frame vs APS-C Camera: Which Should I Choose?
- Which Camera Should I Pick to Shoot Travel Videos?
2. The parts of your camera and what they do
2. The parts of your camera and what they do
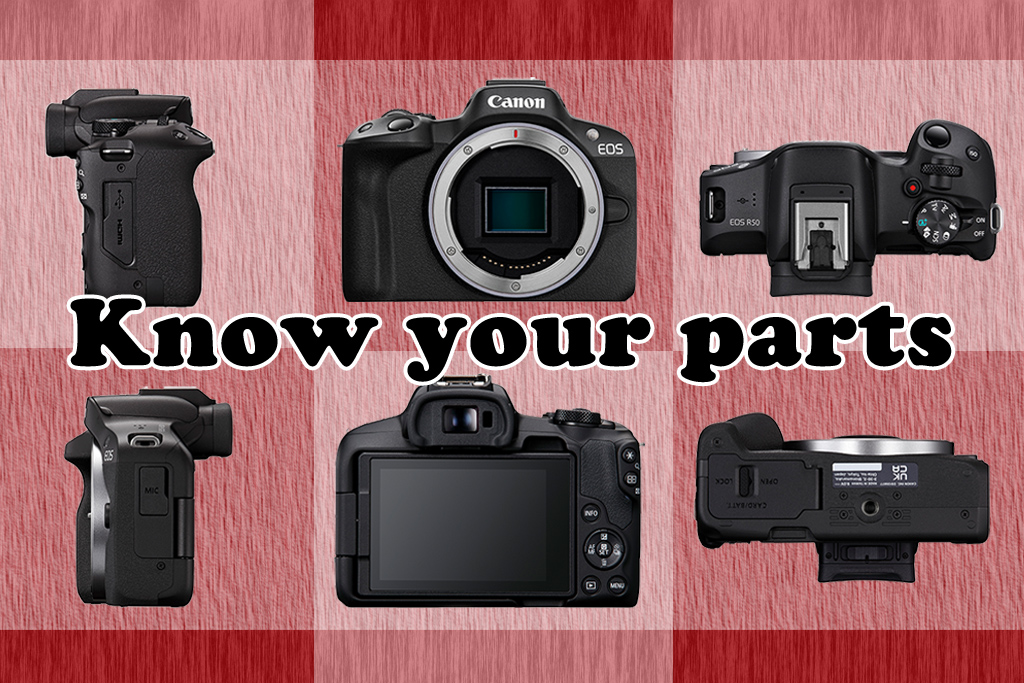
Now that you’ve bought your first camera, your next step is to find your way around it!
Fumbling around causes you to miss important moments. You’ll be able to respond faster and better when you’re familiar with what each button and dial does and how to change camera settings.
- Knowing the Different Parts of the Camera
- How To Maximise Your Camera's Vari-angle Monitor
- New Camera? Here are 9 Useful Settings to Change Before You Shoot
3. The basics of exposure and how to control them
3. The basics of exposure and how to control them
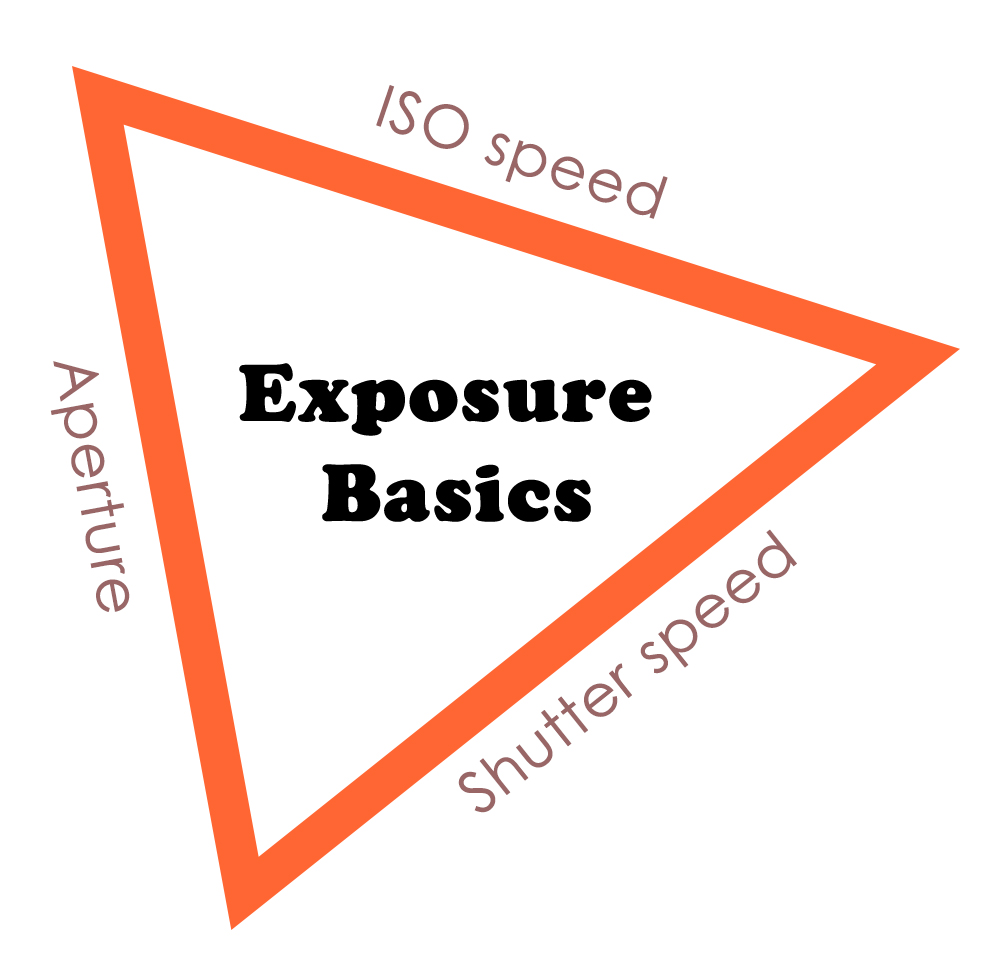
You unlock greater creative and technical freedom when you learn to shoot in manual exposure mode. The key to that is understanding how to balance the aperture, shutter speed, and ISO speed settings to suit your intentions. This will also help you troubleshoot in tricky lighting conditions, and use more advanced techniques such as shooting with Speedlites and studio strobes.
Understanding ISO speed, shutter speed, and aperture
- Aperture
- Shutter speed
- ISO speed
- Exposure
Ideas for application
- Camera Settings to Use for Awesome Slow Shutter Shots!
- Guide to Creating a Starburst Effect with the Sun
- 4 Easy Steps to Capture Those Elusive Bokeh Circles!
- How to Create Dreamy, Colourful Portraits with Foreground Bokeh
“Training wheels” for manual exposure mode
- Camera Basics #16: Aperture-priority AE (AV mode)
- Camera Basics # 17: Shutter-priority AE (TV mode)
- Camera Basics #4: Exposure Compensation
How to achieve the best exposure
- Understanding Dynamic Range: How to Avoid Unnecessary Blown Highlights
4. White balance modes and what they do
4. White balance modes and what they do

White balance is a camera process that corrects colour casts so that objects that are white in real life appear white in your image. Setting the appropriate white balance helps you to achieve more accurate colours on the spot.
You can also use it creatively to alter the image’s colour temperature.
Find out about how to use features like white balance presets, custom white balance, and white balance correction in these articles:
- 4 Ways To Capture Colours More Accurately in Photography
- Camera Basics: White Balance and White Balance Shift
- White Balance Basics to Achieve Your Desired Colour Tone!
- How to Render Colours with the White Balance Correction Function
Case study
- Shooting to Balance Colours: The Glittering Milky Way Over Greenery
5. When and how to use different focus modes
5. When and how to use different focus modes

A beautifully composed shot can fail if important elements are out of focus. In fact, the story an image tells can change depending on what’s in focus!
AF modes and settings
Modern cameras have sophisticated autofocus (AF) systems. Canon’s latest cameras are equipped with the intelligent Dual Pixel CMOS AF system. On the EOS R mirrorless camera series, this accurately detects and tracks subjects over up to 100% x 100% of the image area—much wider AF coverage than on a DSLR!
There are different AF modes you can choose that changes how the autofocus behaves. Choosing the appropriate modes can help you keep the focus on subjects more seamlessly!
- Camera FAQ: What is Servo AF? – Learn about why this mode is best for scenes with moving subjects
- Touch & Drag AF Customisations for Better EVF Shooting—Very useful setup for electronic viewfinder shooting
- 5 Tips for Better Subject Detection and Tracking—Note: features may differ depending on camera model
- 7 Photographers Share: AF & Drive Settings I Switch Based on the Scene
When to use manual focusing (MF)—and the tools to help you do it better
While autofocus technology keeps improving, manual focusing might give better results in some scenes. One example is when you need precise focus on fine details! The Focus Guide and MF Peaking are two useful visual aids that help you fine-tune the focus more easily.
Further reading: Controlling focus for creative expression:
- Depth of field
- Deep focus
6. The effects of different focal lengths and lenses
6. The effects of different focal lengths and lenses
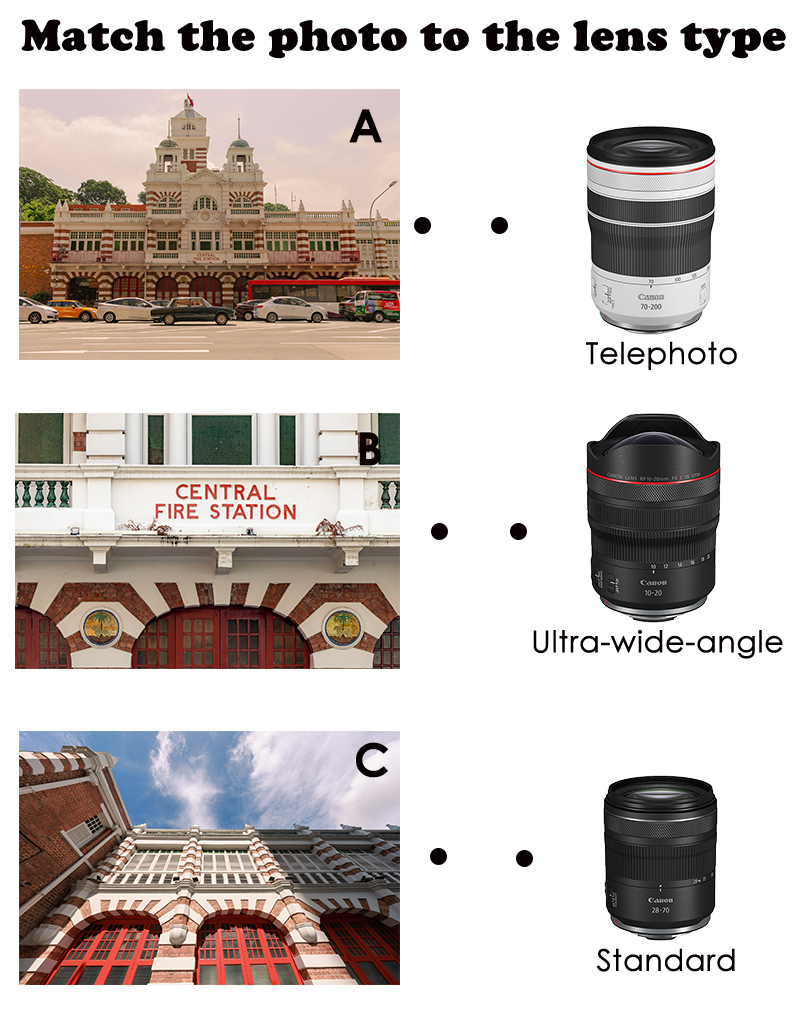
Answers:
A: Standard
B: Telephoto
C: Ultra-wide-angle
A short focal length/ wide-angle lens captures more of the scene; a long focal length/ telephoto lens magnifies faraway objects. But that isn’t the only way different focal lengths transform your image. Learn about what else changes, as well as different types of lenses and their characteristics. You’ll never look at a scene the same way again!
- Lenses 101
- Lens FAQ: What is Focal Length?
- 4 Lens Concepts to Revolutionise Your Photos
- 10 Concepts to Know Before Buying Your Second Lens
- In Focus: Lens Basics
7. The in-camera features that can change how your images look
7. The in-camera features that can change how your images look
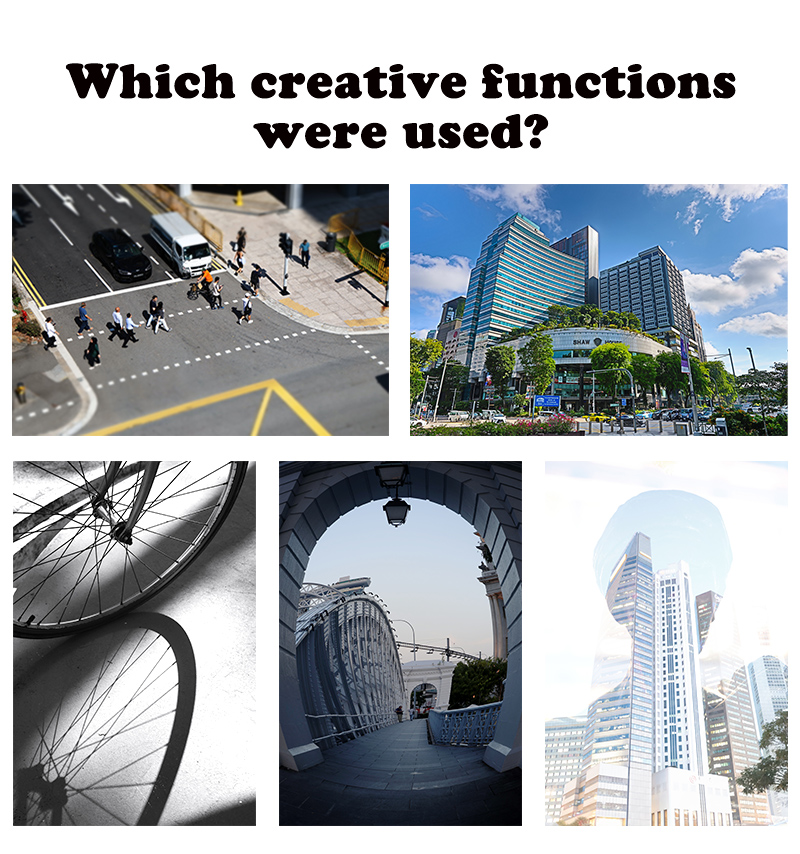
Answers (clockwise from top left):
Creative filter (Miniature effect)
Creative filter (HDR Art Bold)
Multiple exposure
Creative filter (Fisheye effect)
Picture Style (Monochrome)
Photography is also about fun, and sometimes, the fun comes from creating images that bring out a different side of what we see. Here are some other modes to play with: they are in-camera, so you can preview their effects as you shoot and adjust accordingly. Don’t underestimate them: they might be just what you need to achieve the image you envisioned!
Modes that change how your pictures look
- Creative filters
- Picture Style
- Introduction to Black & White Urban Photography
- How to Use Creative Assist to Express Yourself with Colours
- Multiple exposure mode (available on selected cameras)
8. The useful visual guides that help you get things right before you leave the scene
8. The useful visual guides that help you get things right before you leave the scene

Retouching and post-processing may be easier nowadays, but it’s still best to get the image as close to complete in-camera as possible. Some issues such as focus can’t be “fixed in post”, and even for those that can, you could end up sacrificing more than just precious time.
For example, the cropping that happens when you straighten images in post-processing can take impact away from wide-angle images, as well as cut away details that matter to the composition. And if you overexpose or underexpose too much, it won’t be possible to recover the lost highlight/shadow details even if you shot in RAW.
Here are some in-camera tools to help you check before, during, and after the shoot, so you can post-process to elevate your images instead of fixing mistakes!
- Exposure simulation
- Depth-of-field preview
- Grid display and electronic level
- Histogram
- Magnify
Also see:
Understanding Dynamic Range: How to Avoid Unnecessary Blown Highlights
9. The possibilities unlocked by the wonderful Camera Connect app
9. The possibilities unlocked by the wonderful Camera Connect app

Canon’s free smartphone app, Camera Connect, is great for both productivity and creativity. It isn’t just a tool for downloading images to your smartphone—you can also use it to organise images on the go, and even for Live View remote control shooting.
- Camera Connect: When Photography Just Gets More Fun
- 6 Useful Tips for Remote Shooting via Wi-Fi with the Camera Connect App
10. What’s possible when you post-process your images
10. What’s possible when you post-process your images

Post-processing and editing are necessary for overcoming certain camera limitations (like in the example above); it also helps you further refine your images. You can do it for free using the in-camera RAW post-processing function and Canon’s Digital Photo Professional software. Learn more about what’s possible in:
- 5 Essential Adjustments to Do with Digital Photo Professional
- Corrections You Can Do To DPRAW Images
Digital Photography Professional tutorials
- 5 Easy Steps to Merge Light Trails in Digital Photo Professional
- RAW Image Processing: How to Bring Out the Blue in Blue Hour Photos
Also see: Putting Forth Your Best Work: Sports Photography Culling & Editing Tips

