It’s hard to get a good picture of the stars when the moon is visible, but it isn’t entirely impossible! Find out how to do so in one exposure. (Reported by: Minefuyu Yamashita, Digital Camera Magazine)

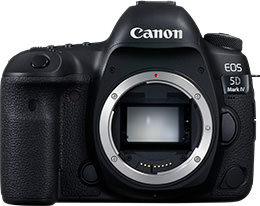
EOS 5D Mark IV/ EF16-35mm f/2.8L III USM/ FL: 16mm/ Manual exposure (f/2.8, 30 sec)/ ISO 3200/ WB: Tungste
Other equipment: Tripod
Step 1: Which moon phase to shoot—Crescent moon
Believe it or not, the picture above may seem to be of the full moon, but it’s actually of a waxing crescent moon! If you really shot on the night of a full moon, you wouldn’t be able to see the stars. The same goes for other moon phases with a fuller moon. If you want to photograph the stars and the moon in the same frame, choose the night of a crescent moon.
Full moon: Moonlight drowns out the stars

Learn more about photographing the moon in:
Exposure Tips and Gears for Moon Photography
Step 2: What time to shoot—When the moon is low
To get clearer stars, try to shoot when the moon is lowest in the sky. This reduces the impact of moonlight.
To get the beautiful, serene blue hues in the main shot, I started shooting about 1 hour after the sun started to set. I completed the shoot before the moon set. At moonset, the moon would be too close to the horizon and cause the strip of sky near the horizon to turn red.
Note: Waxing crescent moons usually set 2 to 3 hours after sunset.
30 minutes after sunset

As the sky is still bright 30 minutes after sunset, the stars are not visible.
Step 3: Decide which focal length achieves the ideal composition—16mm
When I saw the scene, I envisioned framing the moon and the countless stars together with silhouettes of the trees on land. Placing the tree silhouettes around the moon and stars would lead the viewer’s eye to the main subject: the moon. To achieve that composition, I would need an ultra-wide-angle field of view, which was achieved by using the wide end of my ultra-wide-angle zoom lens.

I stepped into the tangle of trees and bushes that grew along the shore, and looked for branches whose shapes made appealing silhouettes.
Tip: Wind blowing through the trees can cause motion blur in the silhouettes. Wait for the wind to stop before you release the shutter.
Step 4: Find the right exposure settings—30 sec; slightly brighter
I chose to shoot a 30-second exposure because anything longer than that would cause the stars to trail. (This is based on the 500 Rule.)
The exposure needed to be slightly brighter to prevent the silhouettes of the tree branches from blending into the darkness. I controlled this by adjusting the ISO speed.
This causes the highlights in the crescent moon to be blown, making it resemble the full moon. However, this works out here as it accentuates the night sky and makes the latter look more impactful.
Tips:
- If your camera has a bulb timer function (most intermediate and advanced camera models do), make use of it.
- To avoid camera shake, release the shutter with the self-timer or Touch Shutter functions, or a remote switch. You can also use the Remote Live View Shooting function on the Canon Camera Connect app.
- The Remote Live View Shooting function is also useful when your camera or remote switch does not have a timer function.
Using the Remote Live View Shooting function on Camera Connect

In Bulb mode, press the shutter release button (indicated in red) to start the exposure.

The display will change to show “Shooting”, and the time elapsed will be shown in ‘A’. If you are using the bulb timer function, the exposure will automatically end after the set duration. If not, press the stop button (‘B’) to end the exposure.
Need more tips and inspirations on photographing stars and other celestial bodies? Check out these articles:
Astrophotography: What To Avoid When Shooting Stars
Astrophotography Techniques to Try with the EOS R
One Location, Two Looks: Photographing a Lighthouse in Moonlight v.s Under the Stars
Composition Technique: Creating the Illusion of a Larger Moon
Slow Shutter Art: Using Zoom Burst to Transform Stars in the Sky into a Meteor Shower
Getting serious about astrophotography and thinking of what gear to add to your arsenal? Here are some to consider:
A camera tailored for astrophotography:
Canon EOS Ra: Shooting For The Stars
A fast wide-angle lens for brighter, cleaner images:
Astrophotography: Capturing Clear Starry Skies with f/1.4 Lens
EF35mm f/1.4L II USM: High-spec Prime Lens Will Change Astrophotography As You Know It
Fisheye lenses to capture more of the sky:
EF8-15mm f/4L Fisheye USM: My Go-to Lens for Photographing Starscapes
(Stay tuned for RF mount versions of these lenses!)
Receive the latest update on photography news, tips and tricks.
Be part of the SNAPSHOT Community.
Sign Up Now!About the Author
A monthly magazine that believes that enjoyment of photography will increase the more one learns about camera functions. It delivers news on the latest cameras and features and regularly introduces various photography techniques.
Published by Impress Corporation
Born in 1979 in Aichi. After gaining experience in jobs such as interior and graphic designing, Yamashita became an independent photographer in 2011. His works have been used in many calendars.


